background

Tuesday, September 25, 2012

Camo Cake

So I was given the challenge to make a camouflage cake for a cousin whose son was turning 2.  I took a cake decorating class this summer with my mother-in-law and sister-in-law and we had a lot of fun.  We didn't learn about fondant though so I've been exploring that on my own.  I found a recipe for marshmallow fondant and let me tell you, its amazing.  So many people like the look of fondant, but not the taste.  Well, problem solved folks!  Its soooo simple.  I used this recipe found here on a blog called The Chaplain's Wife.  Of course I found it through Pinterest.  It is important to knead, knead, and knead some more.  And when I made letters and figures I mixed 50% gum paste in with 50% fondant and I found it much easier to handle.  I also finally got my hands on some of the powdered food coloring and it makes such a difference when making red, black, and brown.
 I made the deer on top by finding an image of a deer silhouette and printing it on card stock, then I cut it out and laid it over some brown fondant and cut it out.  The trees I just did free hand.  I did the letters by just rolling the fondant and then cutting it with a knife and shaping it into the letter.  I found that adding a little (very very little) water helped seal some of the letters together.  My favorite part was the little mallard ducks.  I used to play with that polymer clay in middle school or something and it was very similar.  I wish I had some better pictures for a real how-to, but maybe next time.  To make the camo icing for the bottom rectangular layer I mixed up my colors then piped some blob shapes in until most of the cake was covered, then took the spatula to smooth it all together.  Then I waited a little while before I did the Viva paper towel trick as seen here on Cake Central. I don't usually do the hot-spatula step.  I think the key to camo cake success is in the colors you choose.  I saw a lot of other ones online that had weird yellows and tans.  A couple of shades of green and brown should do it.  Lastly, I'd like to share one of the most wonderful cake decorating tips I've ever come across....Syran Wrap Icing Trick from Karen's Cookies.  It will save you so much time! Happy decorating!


Friday, September 14, 2012

Ribbon Organizer

I don't if its the artist in me or what but my studio (so lucky to have my own space, and I STILL take over the house) is a HOT MESS! I feel like I've tried to organize it several times already, but I continue to fail and pile stuff up to the point that I can't even walk in there right now :( 
So I thought maybe with the help of good ol' Pinterest I could get it together, for GOOD.  Well, I'm short on time so I have to take this in baby bites so I started with my ribbon.  My studio has 7 wonderful windows in it, but therefore I lack a lot of wall space where I could store all the things I'm hoarding.  So stuff ends up in a bag that the cat attacked. . .
The old frame memo board project
There has to be something better, right?  Well I was looking around trying to figure out what to do with the sack of ribbon (am I the only one who can't pass up those stinkin' dollar ribbon racks?!)... when I noticed a different Pinterest project that everyone went crazy over, the old open frame-hang your stuff on clothespins-project.  I have a stack of old frames hanging out in the garage so I figured out a system that would let me hang my ribbon and be able to move things around when I want to.  I like options.  And the best part, I don't have to have a wall, I can prop it up in one of my many windows!
So here's what you need friends:
  • an old wooden frame (mine is for a 12x16 picture)
  • wooden dowels that are close to the width of your frame (mine is 12")
  • screw eyes, 2 per dowel (I used 4 dowels, so I needed 8)
  • screw hooks, 2 per dowel 
  • hammer
  • needle nose pliers
  • a ruler 
You could have a good ol' time and paint your frame ahead of time, but I just wanted to actually complete a project and the color didn't bother me so I left mine alone.
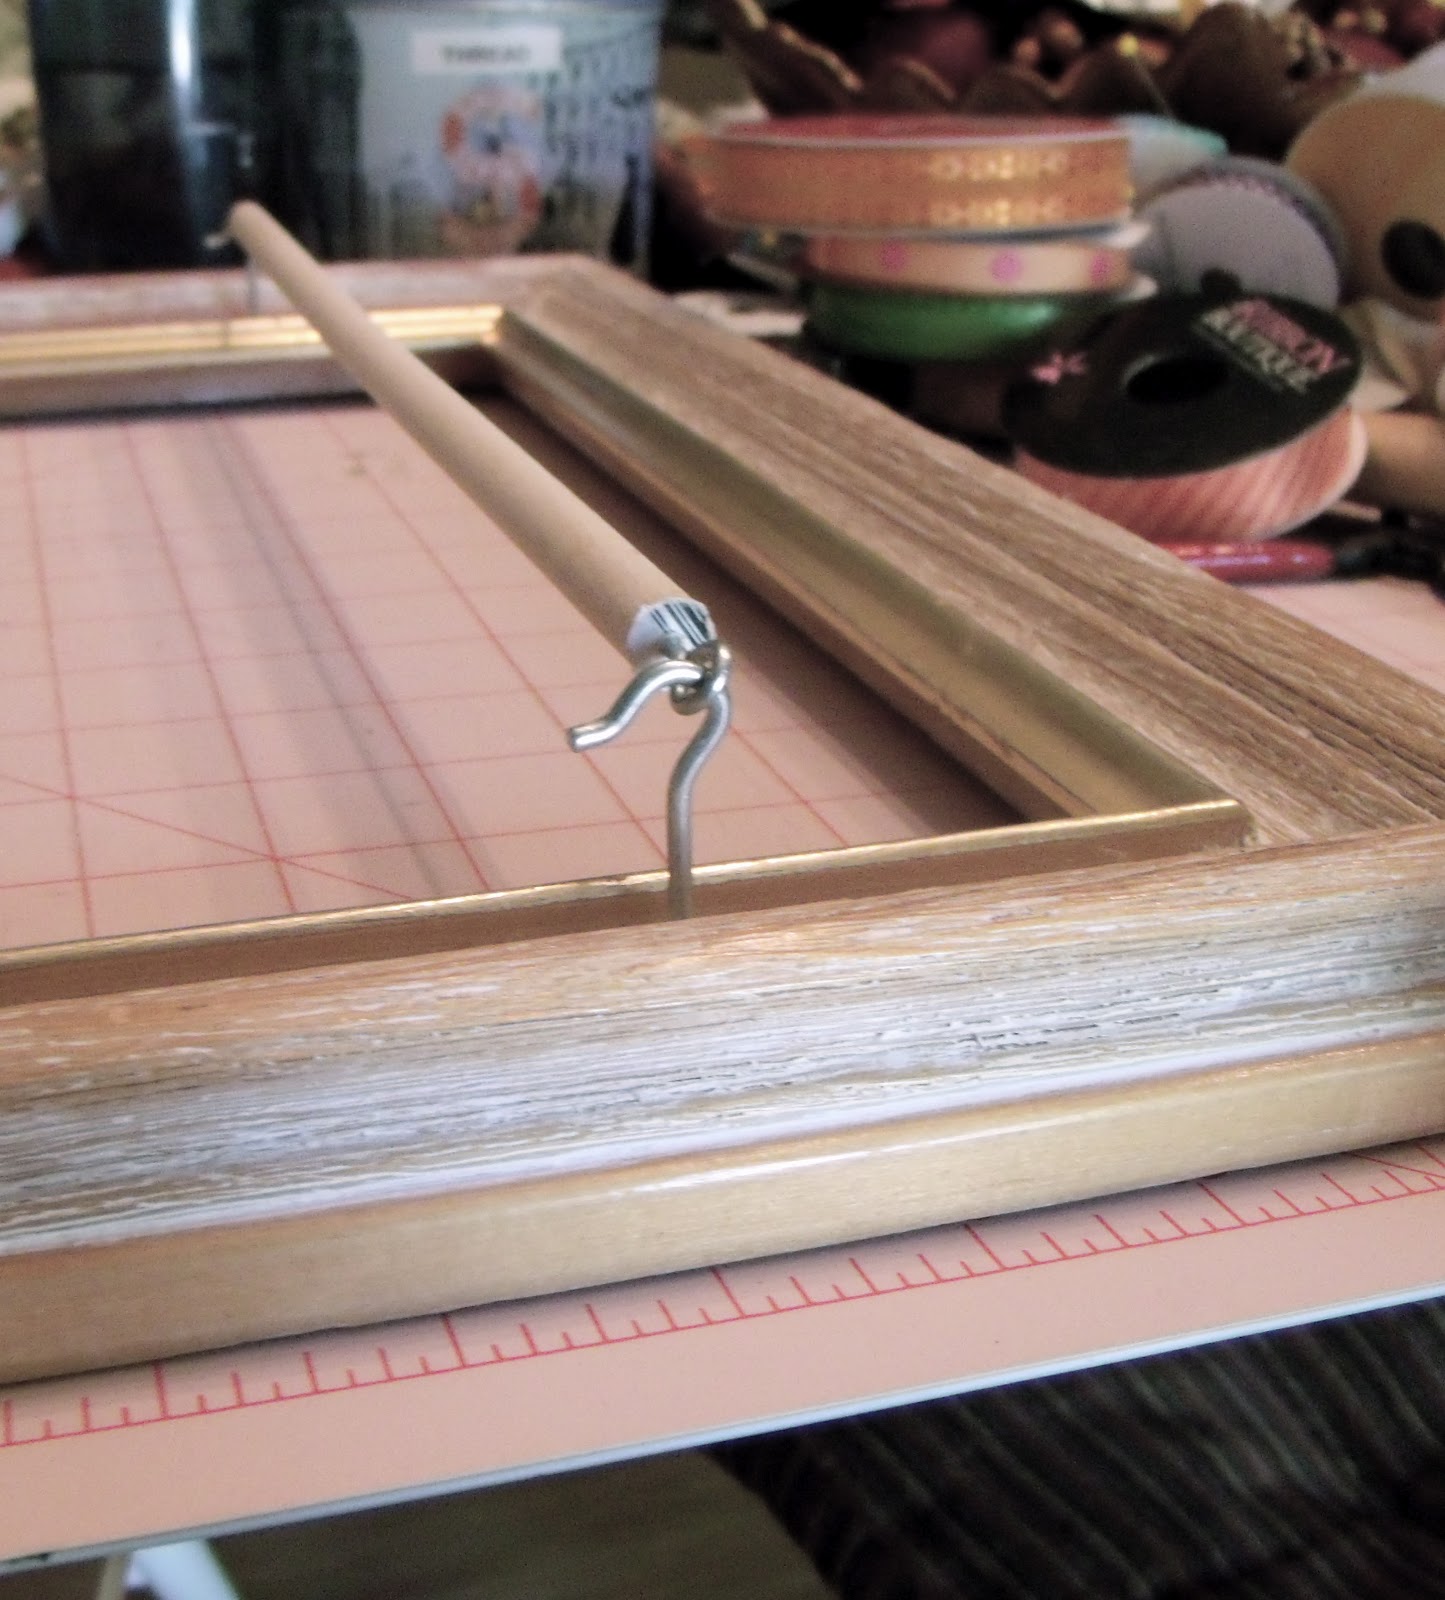
First I inserted the screw eyes into the ends of the dowel.  I used a hammer to tap it in and get it started, then I twisted it a few times with my fingers, then switched to twisting it with the pliers.  I stopped twisting mine when all of the screw threads were in the dowel.  You may have to adjust them a little in or out later to fit easier on your hooks.  


Next I used the hammer to insert the screw hooks into the front of the frame.  You could measure and mark off where you want your dowels.  I just lined up the frame on my cutting mat and eyeballed it.  Remember that ribbon comes in lots of different sizes so I don't have all of my dowels evenly spaced for that reason.  
I held the screw hook with my fingers again to keep it still until it was going into the wood easily.  
Now you can slide your dowels/screw eyes onto the hooks and adjust the eyes as necessary. 
See, that wasn't hard! :) Now add your ribbon, and if you have OCD tendencies you can sort your ribbon by color like me.  
Yay! A little more organization in my life.  It certainly looks better than the bag.  Which by the way the my orange kitty is now enjoying 


Have a great weekend! I'm in party planning mode for Baby Goo's FIRST birthday! So I'm sure I'll be getting started on that long list of projects soon.  Along with some pillowcase dresses for football season.

Welcome Y'all!

So I don't know about you, but I'm obsessed with making things.  Its like I can't breathe without being creative at least a little bit every day.  It certainly got harder to do things once I became a mama but my baby girl (often referred to as my baby goo, just some baby talk) FINALLY started sleeping through the night at about 9 1/2 months and its amazing what you have energy to do when you get to sleep 5-7 hours straight.  So I'm hoping to be able to share the things I do on this blog.  My projects are all over the house (Bless my husband for putting up with Mama and Baby's toys all over the house!) and usually get worked on in bits and pieces (nap time or midnight, and the occasional things I can do while my baby goo entertains herself close by).  So I'll try to be coordinated enough to post on a regular basis.

And is Pinterest great or what?! I LOVE it.  My husband often has to remind me that it will still be there tomorrow and that I should go to sleep.  There are such great ideas and projects and of course inspiration on Pinterest, look me up and follow me! Or click the following button, I tried to make it easy on you!
                                                      Follow Me on Pinterest
 I also have a website for my artwork.  I know how the economy is (I lost THREE jobs in 2010, believe me, I KNOW) and not a lot of people are ready to plop some big dolla' bills down on some original paintings.  Lucky for both of us, my website offers prints in different sizes and prices, so if you like something, surely you'll be able to find something you can afford! My degree is in painting, so I guess its my "original" love, but its also the hardest to do currently as a Mama.  I try to squeeze it in on the weekends or when the hubs is on baby patrol.  You can view my paintings at lindsey-hopkins.artistwebsites.com or click the slide show(just a taste) and it should take you there.
                                                 Art Prints

Ok well, I think thats a good intro for y'all and I'll try to get my first tutorial up before the Goo wakes up from her afternoon nap.